Windows Live Mail client is part of Windows Essentials which is a suite of products available in one easy download. you can download it for free from here.
To setup your email with Windows Live Mail follow the following steps:
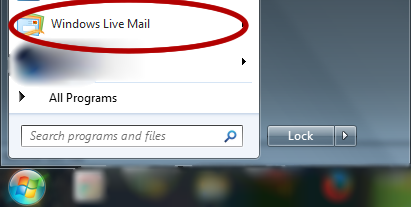
1- Start “Windows Live Mail” client from windows start menu.
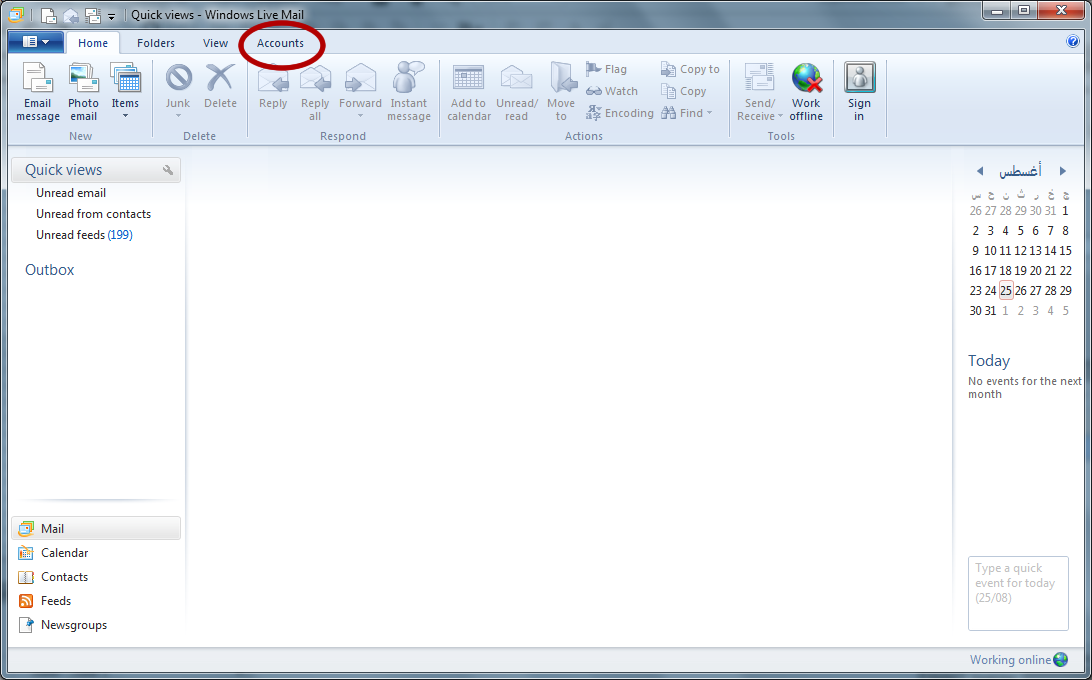
2- Click on “Accounts”:
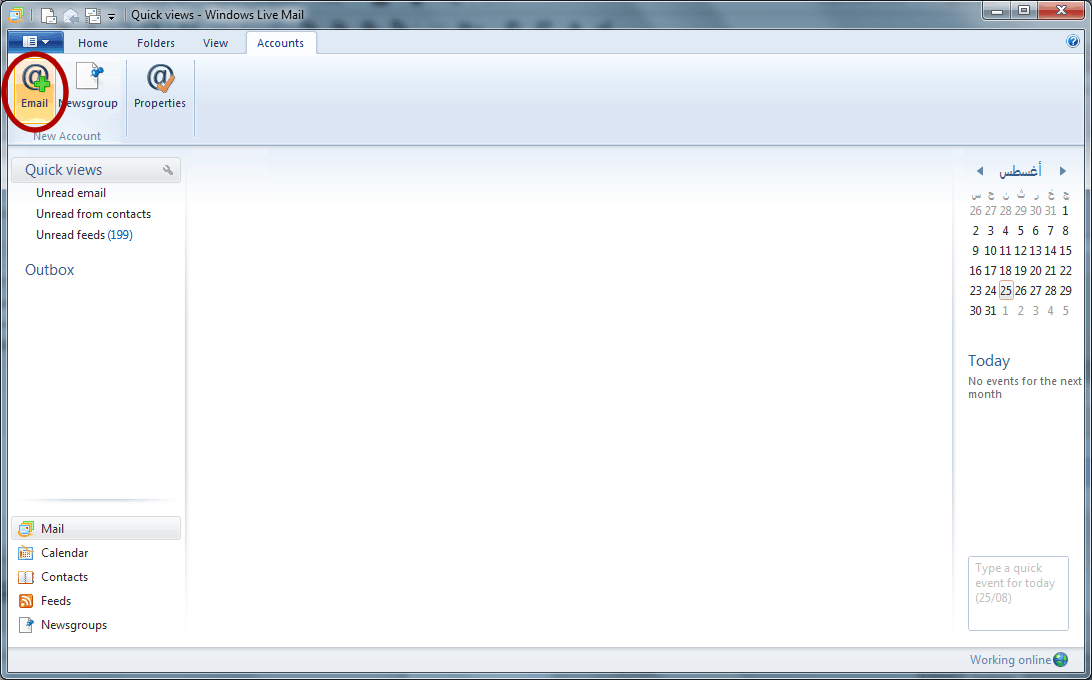
3- Click on “+ Email” to add a new email account:
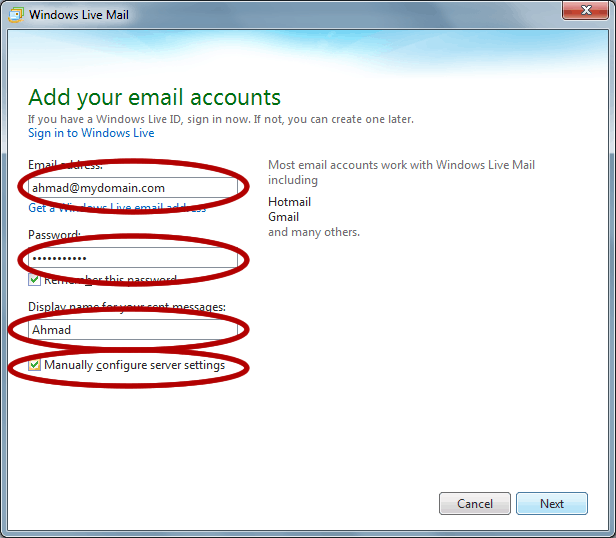
4- Fill in the form with 1) your full email address. 2) your password 3) Your desired display name – it could be your full name or your job title or any nickname you desire. make sure that “Remember this password” and “Manually configure server settings” are checked. and then click “next”.
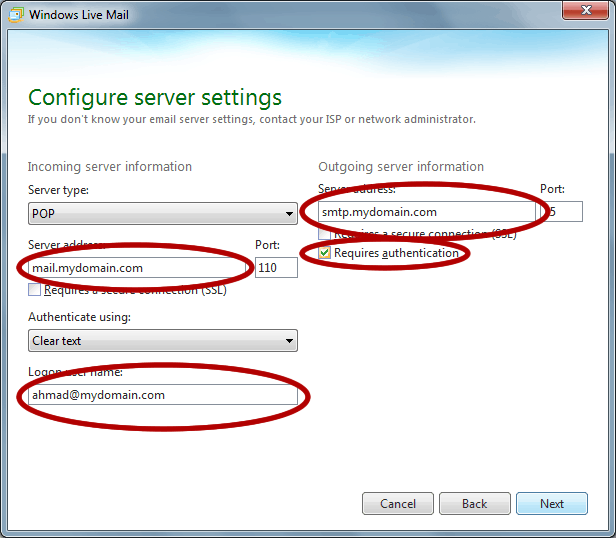
5- Then you will have to fill in the server configurations of your email. you can find these settings in the email you received when we created your account. Make sure you type in your full email address in the “Logon user name” field. and under the outgoing server information make sure that the checkbox “Requires Authentication” is checked. and then click next.
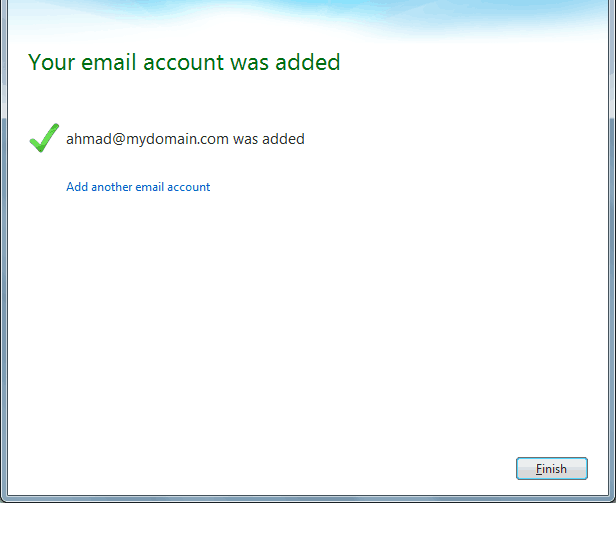
6- Then you will see a confirmation dialog.
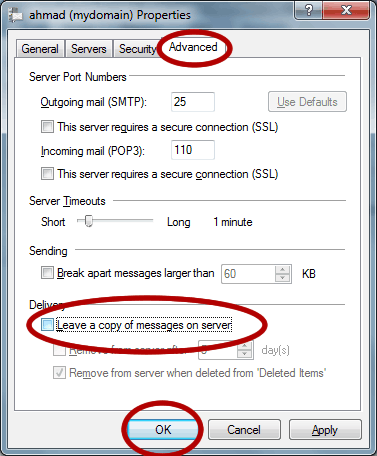
7- Now from the same “Accounts” tab click “Properties”.

8- Click on the “Advanced” tab and make sure that “Leave a copy of messages on server” is NOT checked. and then click “OK” or “Apply”.
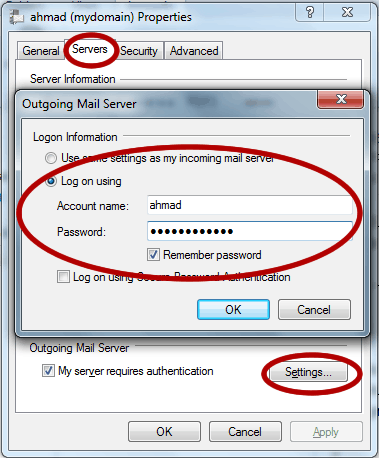
9- OPTIONAL STEP: This step is only needed if we provide you with a different smtp logon information, Please skip this step if no such information was provided: From the same dialog above select the “Servers” tab and then click on “Settings…”, select “Log on using” and fill in the smtp username and password we provided you in the “Account name” and “Password” fields respectively. then click “OK” and “Ok” again to save the settings.
Now you will be able to access your email from “Windows live mail” client. you can send and receive emails with convenience and peace of mind.